
If you’ve ever opened a quilt pattern and felt totally lost — you’re not alone! Quilt patterns can look intimidating at first, but once you know how to read them, they become your best friend. Here’s how to break it down step by step.
1. Start with the Overview
Before diving into cutting or sewing, read the entire pattern from start to finish. Note the quilt’s finished size, the block size, and how many pieces you’ll need. It sounds simple, but understanding the “big picture” makes everything easier.
2. Check the Fabric Requirements
Most patterns list yardage for each color or fabric. If you plan to swap colors or use scraps, double-check measurements — and always buy a bit more than you think you need (¼ yard extra can save you later).
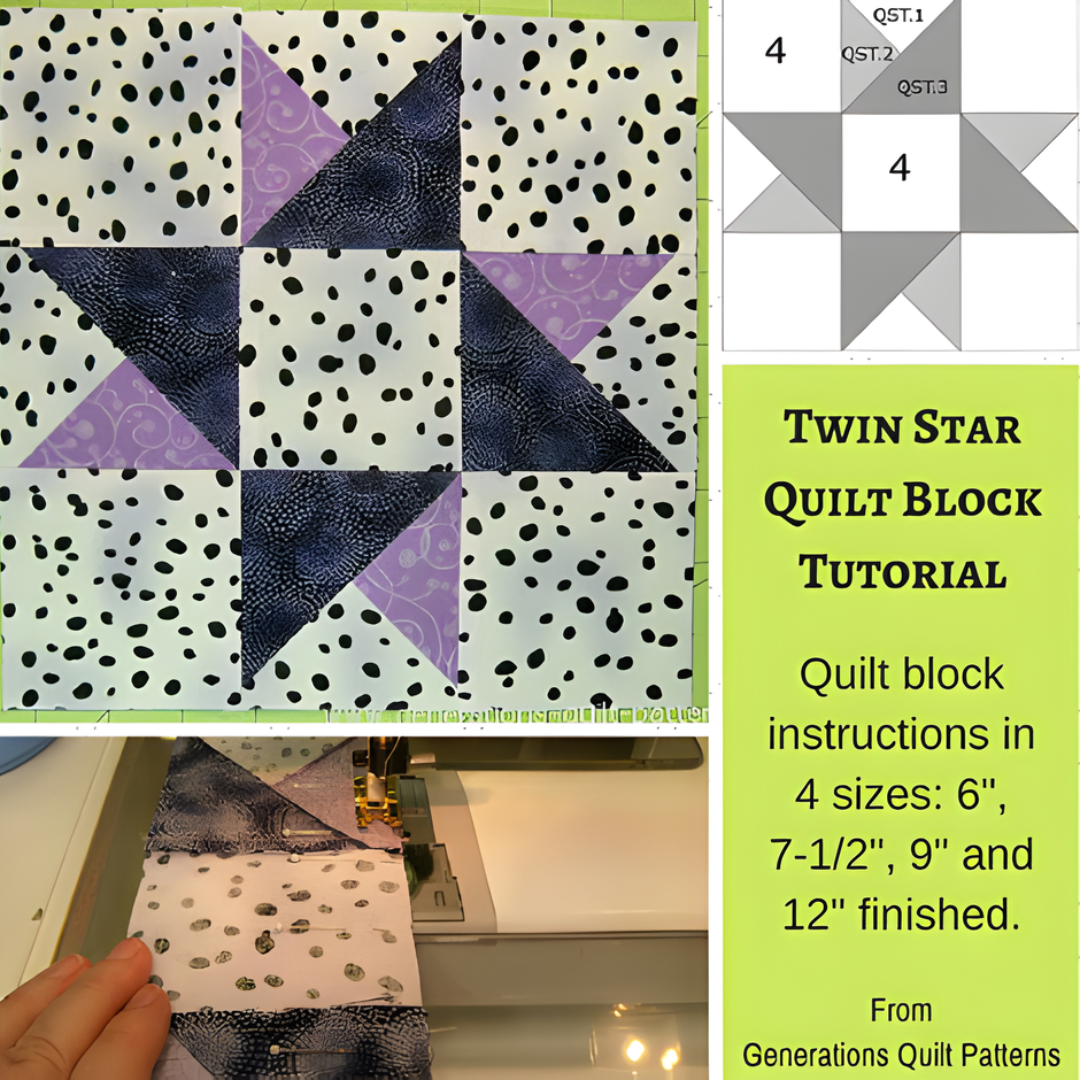
3. Understand the Layout Diagrams
Those little boxes and lines are your roadmap. Look for arrows showing sewing direction, and symbols for right side vs. wrong side. Highlight or color-code them if that helps you visualize.
4. Cutting Instructions Are Key
Accuracy starts here. Use a rotary cutter and quilting ruler, and make sure your pieces match the measurements exactly. Label each pile with sticky notes so nothing gets mixed up later.
5. Follow the Sequence
Quilt patterns are written in a specific order for a reason — each step builds on the previous one. Don’t skip ahead, even if you’re excited.
6. Mark Your Progress
Use a pencil to check off each step as you go. It’s especially helpful for larger projects where you might stop and start over several days.
